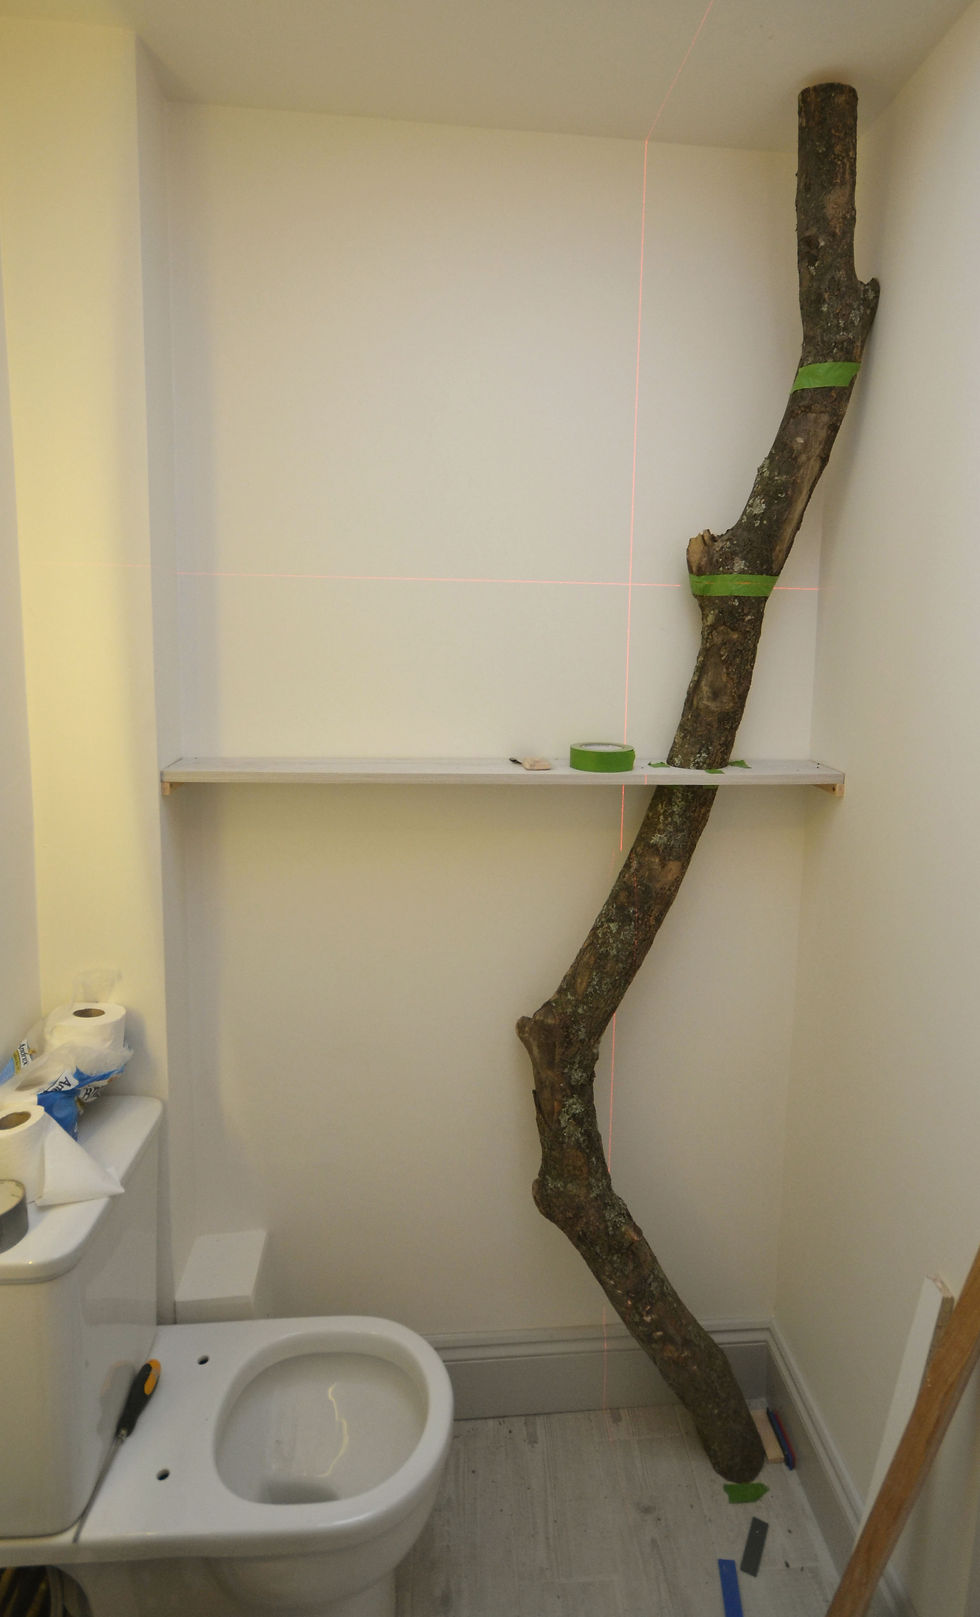
Indoor tree, 2018


Material: 1 tree, timber boards, battens, hacksaw, planner, laser, drill, paint

Cut the tree to the right height and define the position of its base.

Mark the position of the trunk with tape and use a planner to make it level, so that the tree sit nicely on its base

Use a laser to define where you will install the first shelf. Mark the wall with a pencil and mark the tree with a marker over some tape.

Install some timber battens along the pencil mark.

Cut the tree with a hacksaw, following the marker line you have just drawn

Put the tree back in its position and check the level. Use a planner to make sure it is perfectly levelled. Use strong wood adhesive to set the base in position.

Cut a wooden board and screw the tree from above. Use a countersink drill bit to make sure the screw are flush, and nothing protrude.

Install the rest of the tree and use your level again to set the next line. Mark and cut as before.

Drill and set a wooden dowel into the trunk. Use some wood glue to set the base in place.

Repeat until every shelf is installed. Protect each boards and tree and paint every batten with 2 coats of the same colour as the wall ( so they disappear).

